There’s something undeniably enchanting about the warm aroma of a freshly baked cherry pie wafting through the kitchen-a sweet invitation to pause,savor,adn celebrate tradition. “Timeless Charm: Crafting an Old Fashioned Cherry Pie with Lattice” takes you on a journey back to simpler times, where the art of pie-making was a cherished ritual passed down through generations. In this article, we blend nostalgic flavors with classic techniques, guiding you step-by-step to create a cherry pie that not only delights the palate but also pleases the eye with its beautifully woven lattice crust. whether you’re a seasoned baker or a curious beginner, prepare to discover the satisfying rhythm of rolling dough, the vibrant pop of ripe cherries, and the golden finish that makes this old-fashioned dessert a perennial favorite. Let’s bring a slice of history to your table and savor the timeless charm of homemade cherry pie.
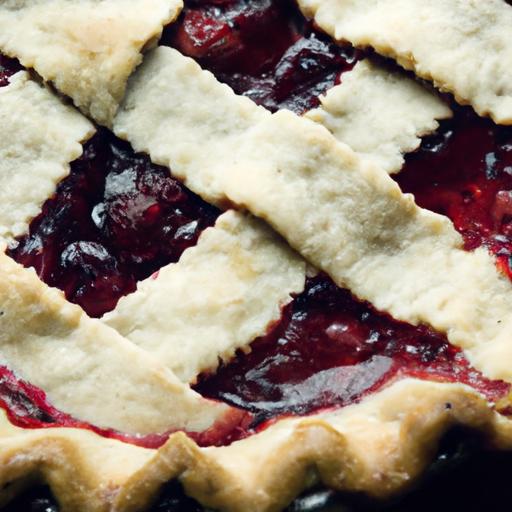
Timeless charm enchants every bite of this old fashioned cherry pie with lattice, whisking you back to cozy kitchen moments where simplicity marries tradition. The vibrant burst of tart cherries folded into a buttery, flaky crust is a nostalgic experiance that never fades. Rooted in American heritage,this dessert captures the soul of homemade goodness,bringing families and friends together around the table. From the carefully selected ingredients to the artistic lattice weaving, every detail here is crafted to celebrate the authentic essence of a classic cherry pie.
Prep and Cook Time
- planning: 30 minutes
- Chilling time (dough): 1 hour
- Cooking/Baking: 50 minutes
- Total time: 2 hours 20 minutes
Yield
Serves 8 generous slices – perfect for sharing or savoring over a weekend treat.
Difficulty Level
Medium – Ideal for home bakers ready to elevate their pie skills with patience and creativity.
Ingredients
- for the Pie Crust:
- 2 ½ cups all-purpose flour,sifted
- 1 cup (2 sticks) unsalted butter,cold and cubed
- 1 teaspoon granulated sugar
- ½ teaspoon fine sea salt
- 6-8 tablespoons ice cold water
- for the Cherry Filling:
- 5 cups fresh or frozen tart cherries,pitted
- 1 ¼ cups granulated sugar
- ¼ cup cornstarch
- 1 tablespoon fresh lemon juice
- 1 teaspoon vanilla extract
- ½ teaspoon almond extract (optional,to enhance cherry flavor)
- A pinch of salt
- For Assembly:
- 1 egg,beaten (for egg wash)
- 1 tablespoon turbinado sugar or coarse sugar (for sprinkling)
Instructions
- Make the Flaky Pie Crust: In a large bowl,whisk together the flour,sugar,and salt. Add the cold butter cubes and use a pastry cutter or your fingertips to combine until the mixture resembles coarse crumbs with some pea-sized pieces. This uneven texture is key to flakiness.
- Add Ice Water Gradually: Drizzle 1 tablespoon of ice cold water over the flour mixture, gently stirring with a fork.Continue adding water, one tablespoon at a time, until dough just comes together when pressed. Avoid overworking it to keep the crust tender.
- Chill the Dough: Divide dough into two disks, wrap in plastic, and refrigerate for at least 1 hour to relax gluten and firm the butter.
- Prepare Cherry Filling: In a large bowl, toss the pitted cherries with sugar, cornstarch, lemon juice, vanilla, almond extract (if using), and a pinch of salt. Set aside for 15 minutes to macerate and thicken slightly.
- Roll out the Bottom Crust: On a lightly floured surface, roll one dough disk into a 12-inch circle, about ⅛ inch thick. Carefully lay it into a 9-inch pie dish, gently pressing into corners. Refrigerate while rolling out the top crust.
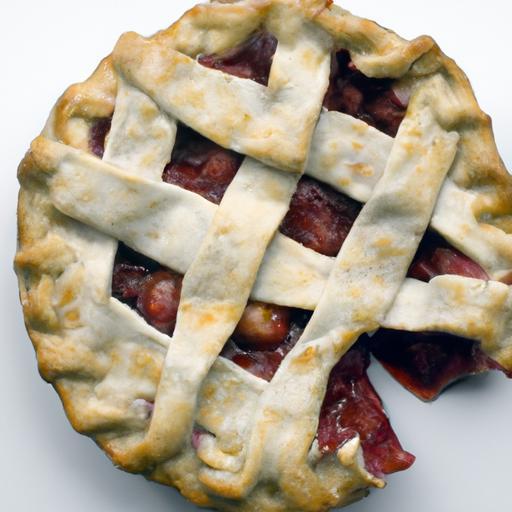
- Create the Classic lattice Top: Roll the second dough disk into a similar size and thickness. Using a sharp knife or pastry wheel, cut into ½-inch wide strips. Weave the strips over the cherry filling in an over-under pattern to create a stunning lattice. Trim edges, then fold under the bottom crust and crimp decoratively.
- apply Egg Wash and Sugar: Brush the entire crust with beaten egg to achieve a golden sheen. sprinkle evenly with coarse turbinado sugar for added sparkle and crunch.
- Bake the Cherry Pie: Place pie on the center rack of a preheated oven at 400°F (200°C). Bake for 20 minutes, then reduce oven temperature to 350°F (175°C) and continue baking for 30-35 minutes or until filling bubbles vigorously and crust is golden brown. Tent edges with foil if thay brown too quickly.
- Cool Completely: Let the pie cool on a wire rack for at least 2 hours. This resting time allows the filling to set beautifully for clean slices.
Tips for Success: Mastering the Perfect Flaky Pie Crust & Cherry Filling
- Keep Ingredients Cold: Cold butter and water prevent premature melting, which creates steam pockets and the perfect flaky layers. chill your rolling surface and rolling pin if possible.
- Don’t Overwork Your Dough: Blend just enough to come together; overmixing activates gluten and leads to toughness.
- Enhance Cherry Flavor: A touch of almond extract amplifies the cherries’ natural aroma without overpowering.
- Binding Filling: Cornstarch ensures the cherry juices thicken well. If you prefer a firmer filling, increase to ⅓ cup.
- Lattice Weaving: Use a ruler or lattice cutter for even strips. Chill the pie for 15 minutes before baking to firm the woven top and reduce shrinkage.
- Make-Ahead: Pie dough freezes beautifully-wrap tightly and store for up to one month. Thaw overnight before rolling.
Serving Suggestions to elevate Your Cherry Pie Experience
Serve slices slightly warm or at room temperature for the best texture and flavor harmony.A scoop of vanilla bean ice cream melting gently over the tangy cherry filling creates a luscious contrast. For an extra touch, drizzle with warm homemade whipped cream or sprinkle toasted almond flakes on top to echo the almond extract in the filling. Garnish with fresh mint leaves for a pop of color and a subtle fresh note.
This pie pairs wonderfully with a bold cup of coffee or an herbal tea, making it a charming centerpiece for afternoon gatherings or holiday feasts. For more homemade pie inspiration, visit our Classic Apple Pie Recipe article.
| Nutrient | per Serving |
|---|---|
| Calories | 350 kcal |
| Protein | 3 g |
| Carbohydrates | 55 g |
| Fat | 12 g |

For detailed guidance on baking perfect homemade pie crusts, consult the King Arthur Baking company’s expert tips, a trusted source for baking excellence.
Q&A
Q&A: Timeless Charm – Crafting an old Fashioned Cherry Pie with Lattice
Q1: what makes an old fashioned cherry pie truly timeless?
A1: The magic lies in its simplicity-a buttery, flaky crust cradling vibrant, tart cherries bursting with natural sweetness. This classic combination evokes nostalgia and comfort, reminding us of homemade goodness passed down through generations. The lattice top adds a charming, rustic touch that not only looks beautiful but also lets the cherry filling bubble and caramelize to perfection.
Q2: Why choose a lattice crust instead of a solid top crust?
A2: A lattice crust is more then just a decorative feature; it allows steam to escape during baking,ensuring the filling thickens without becoming soggy. The woven pattern creates a gorgeous contrast between the golden crust and the jewel-red cherries, drawing the eye and making the pie irresistible before the first bite.
Q3: How do I ensure my cherry filling stays juicy but not runny?
A3: Balancing juiciness with firmness is key. Use fresh or frozen tart cherries, and combine them with natural sweeteners like sugar and a touch of cornstarch or tapioca starch to thicken the juices.Let the filling sit for a bit before baking to help the flavors meld and the thickener fully hydrate, which prevents a watery bottom crust.
Q4: What’s the secret to a flaky, golden pie crust?
A4: keep ingredients cold and handle the dough gently. Use chilled butter cut into the flour until it resembles coarse crumbs, then add ice-cold water just enough to bring the dough together. Resting the dough in the fridge before rolling relaxes the gluten and prevents shrinkage. Brushing the lattice with a bit of egg wash adds that coveted golden shine.
Q5: Can I customize the cherry pie while maintaining its classic charm?
A5: Absolutely! Add subtle twists like a splash of vanilla extract or a sprinkle of cinnamon to the filling for extra warmth.mixing cherries with a handful of fresh blueberries or raspberries can also add complexity without overshadowing the pie’s timeless character.Whatever you choose, the heart of the pie remains a loving tribute to old-fashioned baking.
Q6: how should I serve and store this cherry pie?
A6: serve it slightly warm or at room temperature, perhaps topped with a scoop of vanilla ice cream or a dollop of freshly whipped cream. To store, cover the pie loosely with foil and keep it refrigerated for up to three days. The flavors often deepen and improve after a day,making leftovers a delightful treat.
Q7: What baking tips help achieve the perfect lattice design?
A7: For a neat lattice, roll out your dough evenly and cut strips of uniform width. Weave them carefully over the filling, pressing the edges to seal. Chilling the assembled pie before baking helps maintain the lattice’s shape during oven time. brush with egg wash and sprinkle with sugar to highlight the pattern and add a subtle crunch.
Q8: Why are cherries the star ingredient in this pie?
A8: Cherries bring a splendid balance of tartness and sweetness that brightens the rich,buttery crust.Their juicy texture and vibrant color make the pie both a feast for the eyes and the palate. In a world of complex desserts, the humble cherry pie shines with honesty and heart-a timeless dessert that never goes out of style.
To Conclude
As the aroma of freshly baked cherry pie wafts through your kitchen, you realise that crafting this timeless dessert is more than just a recipe-it’s a cherished ritual that connects generations. With its golden, lattice-topped crust and vibrant, bursting cherries inside, this old fashioned cherry pie is a festivity of simplicity and tradition. Whether shared at a family gathering or savored in a quite moment, each bite carries the warmth and love of homemade goodness. So next time you seek a sweet escape into the past, remember: a classic cherry pie isn’t just a dessert-it’s a delicious piece of history, lovingly crafted one lattice strip at a time.