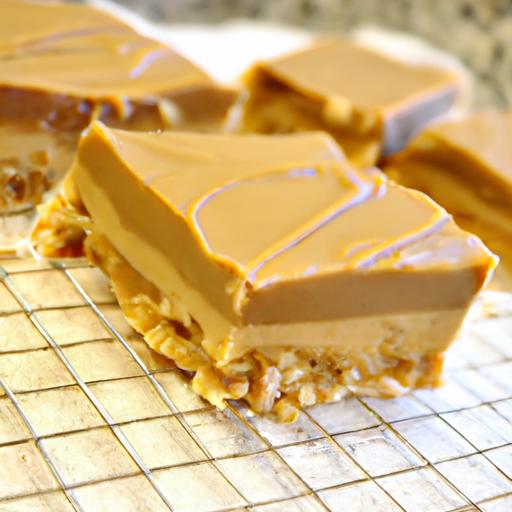
If you’re on the hunt for a sweet treat that combines rich, creamy peanut butter with a satisfyingly chewy texture-without ever turning on the oven-then these Irresistible No-Bake Peanut Butter Bars are about to become your new best friend. Effortlessly simple yet bursting with flavor, these bars are the perfect blend of indulgence and ease, making them an ideal go-to for busy weeknights, last-minute guests, or just a well-deserved snack break. dive into a world where tasty meets convenient, and discover how a few simple ingredients can come together to create a dessert that’s both comforting and impressively scrumptious.
No-bake peanut butter bars are the ultimate easy treat that combines creamy richness and satisfying crunch in every bite.Born from a love of fast, fuss-free desserts and decades of perfecting simple pantry-friendly sweets, these bars deliver a nostalgic flavor with modern ease. Whether you need a last-minute dessert for guests or a wholesome snack on the go,these bars promise indulgence without the oven hassle.
Choosing the Perfect Ingredients for Creamy and Crunchy Texture
To achieve that signature balance of creamy and crunchy textures, the quality and type of ingredients you use are crucial. Opt for natural peanut butter with no added sugars or oils to keep the taste pure and nutty.Creamy peanut butter forms the luscious base, while rolled oats or crushed graham crackers provide the much-loved crunch. A touch of honey or maple syrup adds subtle sweetness and acts as a natural binder, ensuring the bars hold together perfectly.
Don’t overlook the pinch of salt-it enhances the peanut flavor dramatically. Adding miniature dark chocolate chips or chopped nuts can take these bars from simply delicious to decadent,but keep the ingredient list minimal for that easy,no-bake charm.
Step-by-Step Guide to creating Your Irresistible No-Bake Peanut Butter Bars
- Prepare your pan: line an 8×8-inch square pan with parchment paper, letting excess hang over the sides for easy removal later.
- Mix the wet ingredients: In a medium bowl, combine 1 cup of creamy peanut butter, ½ cup of honey, and ½ cup melted unsalted butter.Stir until smooth and homogeneous.
- Add dry ingredients: Gradually fold in 2 cups of rolled oats and 1 cup of crushed graham crackers. Mix gently until every oat is coated, creating a thick, sticky mixture.
- Press the base: Firmly press the mixture into the prepared pan using the back of a spatula or clean hands to create an even layer.
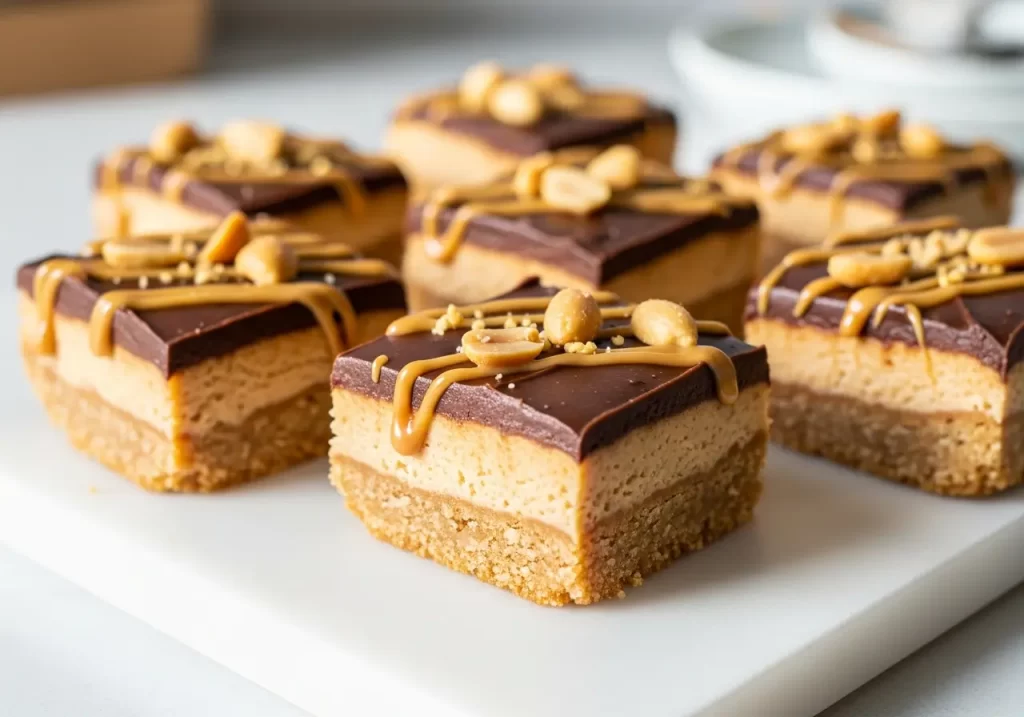
- Optional chocolate topping: Melt ½ cup of dark chocolate chips and drizzle evenly over the bars. For an extra glossy finish, spread the chocolate carefully with a spatula.
- Chill: Refrigerate the bars for at least 2 hours or until fully set and firm enough to cut cleanly.
- Slice and serve: using the parchment paper, lift the bars from the pan and slice into 12 squares. Store leftovers in an airtight container in the fridge.
Tips and tricks for Storing and Serving your Peanut Butter Bars
For the best texture and flavor, store these no-bake peanut butter bars in the refrigerator in an airtight container. They keep fresh for up to one week, making them perfect for meal prepping snacks or desserts.
If you prefer softer bars, allow them to sit at room temperature for 10-15 minutes before serving-this slightly softens the chocolate and peanut butter layers for an even creamier experience. When serving, garnish with a light sprinkle of flaky sea salt or a few crushed peanuts for a sophisticated contrast.
For on-the-go enjoyment, wrap individual bars in parchment paper or place them in reusable snack bags.These bars also freeze well-just thaw overnight in the fridge before enjoying to preserve their creamy, crunchy texture.
Prep and Cook Time
- Prep time: 10 minutes
- Chill time: 2 hours
- Total time: 2 hours 10 minutes
Yield
- 12 bars
Difficulty Level
- Easy
Ingredients
- 1 cup creamy natural peanut butter
- ½ cup honey (or pure maple syrup)
- ½ cup unsalted butter, melted
- 2 cups rolled oats
- 1 cup crushed graham crackers
- ½ cup dark chocolate chips (optional)
- Pinch of fine sea salt
Instructions
- Line an 8×8-inch pan with parchment paper, leaving sides overhanging.
- In a mixing bowl, whisk together creamy peanut butter, honey, and melted butter until smooth.
- Fold in rolled oats, crushed graham crackers, and a pinch of salt until evenly combined.
- Press mixture firmly into pan, smoothing the top with a spatula.
- Optional: melt dark chocolate chips in the microwave in 30-second intervals, stir well, and drizzle or spread over the pressed mixture.
- Chill for at least 2 hours until firm.
- Use parchment edges to lift from pan and cut into 12 bars.
Tips for Success
- Use natural peanut butter without added sugar or oil for the best flavor and texture.
- Lightly toast oats before mixing for extra nuttiness and crunch.
- Substitute honey with maple syrup to make the recipe vegan-friendly.
- If bars are too crumbly, add a teaspoon of water or extra honey to improve binding.
- For an extra indulgent layer, sprinkle chopped peanuts or drizzle melted white chocolate before chilling.
Serving Suggestions
Serve chilled with a cup of cold milk or your favorite coffee for a delightful afternoon snack. Garnish bars with a light sprinkle of flaky sea salt or a few whole peanuts pressed into the top for gorgeous visual appeal and contrasting texture. These bars also pair beautifully with fresh fruit or a scoop of vanilla ice cream when served as a dessert.

| Nutrient | Per Bar |
|---|---|
| Calories | 220 |
| Protein | 7g |
| Carbohydrates | 18g |
| Fat | 15g |
Explore more quick and delicious snacks in our No-Bake Dessert Collection. For detailed health benefits of peanuts and peanut butter, check out Harvard T.H. Chan School of Public Health’s resource.
Q&A
Q&A: Irresistible No-Bake Peanut Butter Bars: Easy & Delicious
Q1: What makes these no-bake peanut butter bars so irresistible?
A1: It’s the perfect harmony of creamy peanut butter, rich chocolate, and a touch of sweetness combined with a satisfyingly chewy texture.Plus,they’re incredibly easy to whip up-no oven required-making indulgence quick and fuss-free!
Q2: How long do these bars typically take to prepare?
A2: From start to finish,you’re looking at about 15 to 20 minutes of hands-on time. Then, just a bit of chilling in the fridge to let them set into that perfect fudgy delight.
Q3: Can I customize the ingredients to suit different dietary preferences?
A3: Absolutely! Swap regular peanut butter for natural, unsweetened varieties or even almond or cashew butter for a nutty twist. Use gluten-free oats or add a sprinkle of chia seeds or shredded coconut for extra texture and nutrition.
Q4: what’s the secret to getting the chocolate layer smooth and glossy?
A4: Using good quality chocolate chips or chopped chocolate and gently melting them-preferably over a double boiler or in short bursts in the microwave-helps achieve that silky,shiny topping that makes these bars so tempting.
Q5: How should I store these bars to keep them fresh?
A5: Store them in an airtight container in the refrigerator for up to a week. if you want to keep them longer, pop them in the freezer-just thaw for a few minutes before enjoying.
Q6: Are these bars kid-friendly and safe for lunchboxes?
A6: Definitely! They’re a wholesome treat packed with protein and natural sweetness,perfect for after-school snacks or a little energy boost during the day.
Q7: Can I make these bars vegan or dairy-free?
A7: Yes! Use dairy-free chocolate chips and a plant-based butter or coconut oil alternative for the chocolate layer. Most peanut butters are naturally vegan, making it an easy swap to fit your needs.
Q8: Is it possible to add a crunchy element to these bars?
A8: For sure! Toss in some chopped nuts, crispy rice cereal, or even a handful of seeds to add a delightful crunch that contrasts beautifully with the creamy peanut butter base.
Q9: What’s the best way to cut these bars without making a mess?
A9: Chill them thoroughly until firm, then use a sharp knife warmed slightly under hot water and wiped dry before slicing. This ensures clean, neat edges and less sticking.
Q10: Can I double or halve the recipe easily?
A10: Yes, the recipe scales beautifully-just adjust your mixing bowl and container size accordingly, and keep an eye on chilling times to ensure the bars set perfectly.
Final Thoughts
In the world of sweet treats,these Irresistible No-Bake Peanut Butter Bars stand out as a perfect harmony of simplicity and flavor. With just a handful of pantry staples and zero oven time, they transform everyday ingredients into a decadent delight that’s ready whenever your cravings strike. Whether you’re a seasoned baker looking for a quick fix or a beginner eager to whip up something remarkable, these bars deliver pure satisfaction in every bite. So next time you want to indulge without the fuss, remember: sometimes, the easiest recipes are the most delicious-and these no-bake bars prove it with every irresistible mouthful.